"Where Performance and
Perfection are a Passion"

The body ready to be returned to Florida and installed on the owner-restored chassis.

1929 Ford Model A Sedan

This Fordor Sedan was brought for us to do a partial restoration consisting of repairing all the sheetmetal, replacing the wood, and painting the body.
The body was in sad shape from sitting in the damp Florida weather.
Once disassembled and the wood removed, the entire shell was media blasted to remove the paint and rust.
Close inspection reveals the rust deterioration and the rusted through areas filled with old body filler.
Another view of the body shell.
Any areas that have rust holes are repaired by fabricating a piece of sheetmetal that can be welded in the panel.
A close-up view of the patch panel fit.
Tig welding the patch panel in solid.
The entire lower section of the body had rotted away so a new section was fabricated.  Here it is tack-welded onto the body shell.
Warpage is kept to a minimum by stitch welding the replacement panel to the original metal panel.
The replacement panel is fully welded now and ready for grinding and metalfinishing.
After grinding the welds, any areas that need to be re-welded will be done.
A view of the R/R Quarter Panel showing the repairs made to the sheetmetal.
The cowl that is unique to the Fordor Sedan needs sheetmetal repairs too.
This is a picture of our dies we crafted to use in our small Power Hammer to form panels for the Briggs Fordor Sedan cowl.
A picture showing the patch panel being formed.
A ‘Before’ (on right) and ‘After’ (on left) view of the cowl replacement panel.
Mocking up the patch panel and trimming it to fit.
With the panel trimmed for a exacting fit, it is tack-welded into place.  After complete welding, this repair will be equally as strong as when this panel was originally manufactured at the factory.
Laminating Ash lumber to be sawn for the body wood.
Individual pieces are cut and fitted, and then sealed with a urethane sealer for moisture protection.
Using a straightened frame for mock-up, each piece is trial fit one last time before final gluing and the sheetmetal installed.
A view of the wood infrastructure from the right rear.  Notice the quality of the splices and fits.  This is crucial in ensuring the body will withstand the rigors of driving.
Installing the wood infrastructure inside the doors.
All interior sheetmetal is epoxy coated prior to installing the wood.  Even the brackets are all repaired and then powdercoated for lasting quality.
Where seen, all fasteners are era-correct slotted head screws and square headed nuts as originally manufactured.  The detail is done to preserve authenticity.
A view of the header assembly.
With all the sheetmetal media-blasted one final time and then treated with an acid to prevent corrosion, it is sprayed with epoxy and installed on the wood framework.
Bodynails with the correct shaped heads are used to nail the sheetmetal to the framework.
Installing the door posts after the measurements have been verified to be within tolerance.
After the wood work has been completed, the body is ready for the bodywork.
Smoothing the rust damage on the firewall.
Making the body totally flat by using a minimal amount of filler.
The doors have been bodyworked and ready for painting.
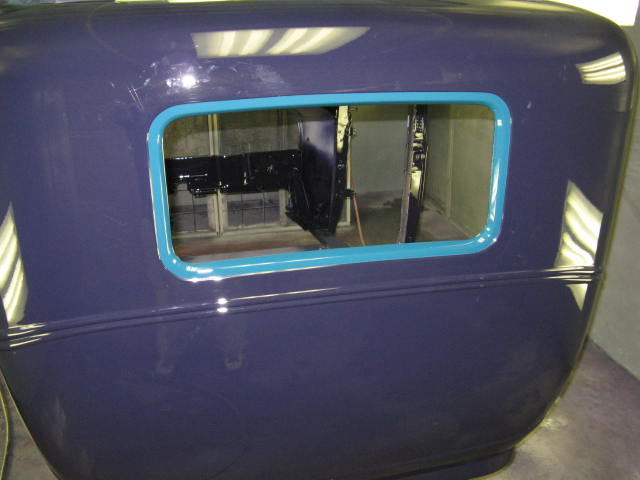
The body shell is painted in Andulusite Blue and ready for the reveal to be painted.
The restored body is masked off for painting the reveal areas.
A view of the rear panel being painted.
Oh how the Niagara Blue reveals set off the darker Andulusite Blue paint color.
A top quality paint job that will last a lifetime!
1929 Phaeton, 1930 Sport Coupe, 1931 Coupe, 1930 Fordor Sedan, 1928 Roadster

Copyright © 1997 - beyond, B. Terry Vintage Automotive
All Rights Reserved.
Reproduction or publication prohibited without permission.

This website is not affiliated with the Ford Motor Company.
The Ford logos are trademarks of the Ford Motor Company.